
Add Honen as an LTI Advantage external tool so instructors can choose courses and graded assignments from Moodle. Use Moodle 3.10 or later with the LTI Advantage services needed for your rollout enabled.
You need a Moodle site administrator and a Honen administrator. The Honen administrator needs Manage integrations and Manage identity providers permissions.
1. Configure the Honen launch
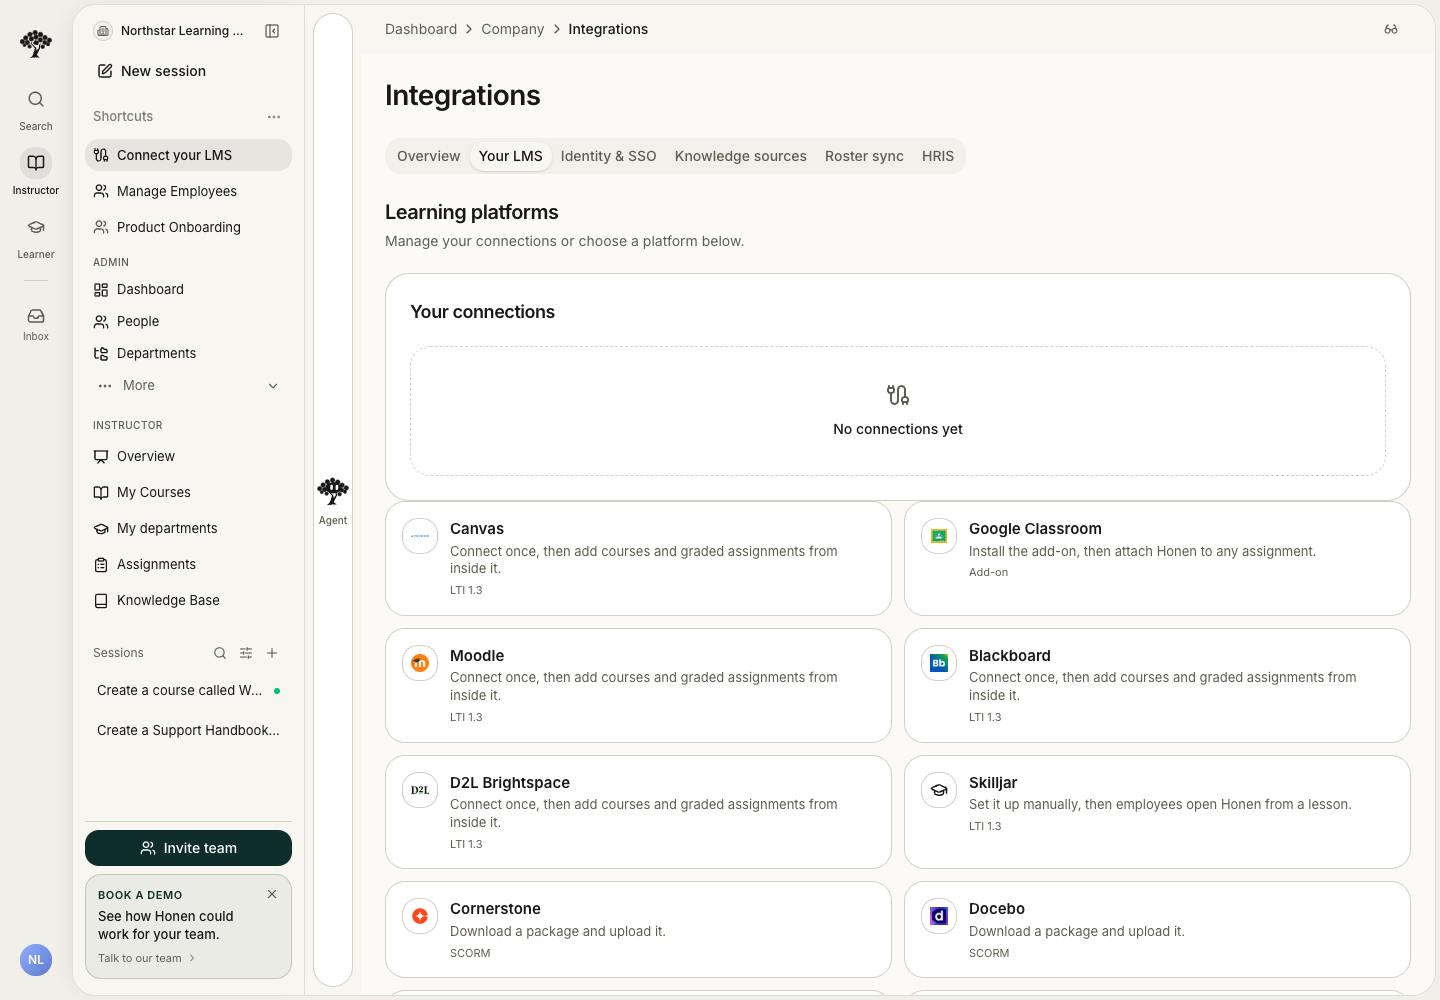
- Open Organization → Integrations → Your LMS → Moodle.
- Review LTI app branding, save any name/logo change, and choose the learner launch and landing options.
- Open Advanced options. Choose the default grade policy and confirm workspace/group role mappings.
- Copy the Dynamic registration URL with those options selected.
Use LTI settings and reporting to choose between embedded, new-tab, and hub experiences.
2. Register in Moodle
- Open Site administration → Plugins → External tool → Manage tools.
- Paste the Honen registration URL into Tool URL.
- Choose Add LTI Advantage.
- Activate Honen and review the tool's enabled services.
- Return to Honen and confirm the connection in Your LMS connections.
For a manually managed registration, use Manual LTI registration and the platform values from Moodle.
Match existing Honen accounts
Automatic matching is optional. Enable it when your organization controls the emails supplied by Moodle.
- Configure Moodle to send each user's name and email to Honen.
- Open the intended Honen workspace's LMS integration page.
- Under One account across identity providers, enable Link sign-ins from trusted providers.
- Select this Moodle LTI connection.
- Select your Moodle roster sync connection if you use roster sync.
- Select Microsoft Entra SSO if learners will also use that directory.
- Wait for the saved confirmation after each change.
- Open the Moodle connection's Edit settings.
- Enable Show only owned, editable, or linked-group courses if you want to restrict course selection.
- Choose Save settings.
- Launch as an instructor with the same email in Moodle and Honen.
- Confirm the instructor's name and courses under Your courses.
Selecting the LTI source also enables that connection's existing automatic email-linking permission. You do not need to register the tool again. An existing workspace member with the matching email uses the same account, regardless of the original signup method. With JIT provisioning enabled, a new person receives an LMS account with the trusted email and supplied name. An account outside this workspace can use the same email; its access and history remain separate.
Returning launches use the saved Moodle identity. A later email change does not redirect that identity to another member. Historical placeholder activity remains stored on its original account; this setting does not move or delete saved work. If two current members share an email, ask your Honen account team to review the records before rollout.
For roster sync, use each person's stable Moodle user ID whenever possible. Selected roster sources use the matching member email. An entry already bound to another account requires review. If Moodle omits an email, correct its tool privacy settings and test another launch. Honen cannot recover an address that the provider does not send.
The older per-connection Automatically link existing Honen accounts by email option remains available. Workspaces without selected sources keep their existing matching policy. All LMS sessions remain limited to the connected workspace. Honen uses the supplied learner name and hides course-sharing controls during LMS learning.
For direct sign-in outside Moodle, share your workspace's Honen subdomain after configuring its SSO method. See Learner identity and sign-in for the full rollout checklist.
3. Add content to a Moodle course
- Open the intended Moodle course as an instructor.
- Add an External tool activity and select Honen.
- Use Deep Linking to choose a course or graded assignment in Honen.
- Save the activity in Moodle.
- For a graded assignment, confirm the Moodle grade settings and the Honen passback policy.
Open the saved activity to confirm that it shows the selected course or assignment. If an older activity opens the class hub instead, edit the activity and use Select content again. Choose the intended content, save the activity in Moodle, and open it again. You do not need to reconnect the Honen tool registration.
Open Honen without choosing an assignment
Create a separate External tool activity named Open Honen, using the existing Honen tool registration. Do not use Select content for this activity.
In this activity's advanced settings, set Custom parameters to honen_launch_target=dashboard and set its grade type to None. Keep this parameter on the activity, not on the shared tool configuration. Save and launch the activity from Moodle to sign in to the Honen dashboard. The same connection, user matching and workspace permissions apply.
For a central entry point, a Moodle administrator can put this activity in a course available to the intended users and link to that Moodle activity from site navigation. Linking directly to Honen's callback URL does not start an authenticated LMS launch. Existing course and assignment links keep their original destinations.
An old placeholder removed from the member list can still link to its matching current organization member on the next verified launch. If an instructor's real Honen account is only in an old workspace, add that account to the current organization before expecting automatic matching.
4. Verify launch, roster, and grades
Open the activity as a test learner. Confirm the intended content and class context, then complete the selected requirement. Inspect the grade in Moodle when using a graded assignment and AGS. If using NRPS roster sync, check the corresponding Honen group and learner membership.
Also launch as an instructor so you can check the management experience. Test the actual browser and embedded/new-tab mode your learners will use.
Keep the connection aligned
In Honen, open the saved connection's Edit settings to review its launch, landing, grade, and role choices. Choose Save settings and test any change before wider rollout. Use the displayed secure launch-domain status and Re-check when provisioning needs another check.
Continue with LTI 1.3 settings, Groups, or SCORM export for a package delivery path.